Benefit

Cream Eyeshadow

Are you afraid to navigate the world of cream eyeshadows? For some, there are simply too many unknowns like, “Do I use a brush or my fingers for application?” or “Do I buy a cream eyeshadow stick or a pot version?” Well, leave all the doubts behind because we are about to deconstruct cream eyeshadows.

First of all, do not be afraid to use a cream shadow. In fact, cream shadows are much easier to maneuver because they can be applied by using your fingers. Now, creams do dry quite quickly, so be sure to blend as soon as you apply. If you can’t bring yourself to apply using your digits, then I highly recommend MAC brush 217. You simply cannot go wrong with the mother of all blending brushes.

As for choosing between pots or sticks, I personally like both for different reasons. For instance, shadow sticks are very easy to apply straight to the eyelid. However, they can dry out quickly if you do not keep the caps on tight. The same can be said about cream pots, but I normally keep them in their original box packaging to help increase their shelf life.  So have no fear and have fun with some cream shadows.  You will love the added dimension they give whether or not you decide to place a traditional powder shadow above it.

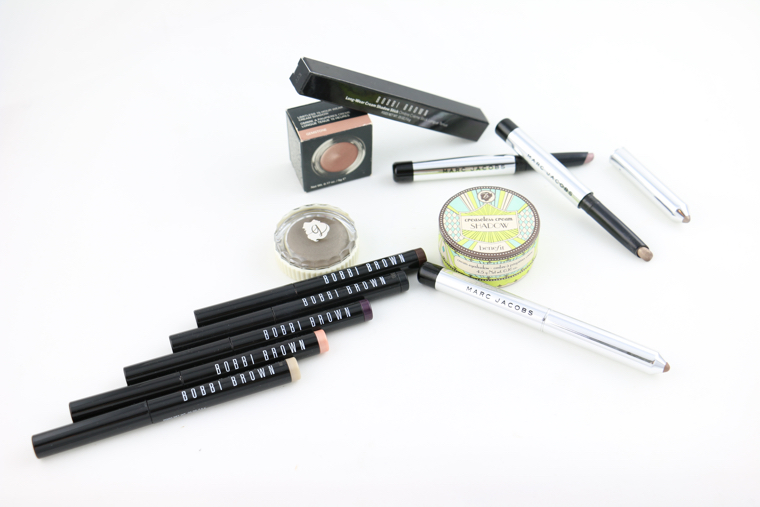
Below are some of my absolute favorite cream shadows:

  1. Maybelline Eye Studio Color Tattoo Eyeshadow ($6.99 at Ulta):  The Maybelline cream shadows are not only affordable, but they come in an array of colors. If you can only choose one from their collection, I would highly recommend Bad to the Bronze. This is a fabulous neutral that goes well with eyeshadows in the same color family.
  2. Benefit Cosmetics Creaseless Cream Shadow ($20 at Ulta)
  3. Marc Jacobs Twinkle Pop Stick Eyeshadow ($28 at Sephora):  If your looking for a perfect shade for the inner corner of your eye than I highly recommend the shade Honey Bunny.
  4. Bobbi Brown Long-Wear Cream Shadow Stick ($29 at Sephora)

Is a Primer Necessary?

Do you remember a time when your makeup look consisted of some foundation, a little bit of eyeshadow, some CoverGirl mascara, and lips topped off with gloss? It all seemed so simple and straightforward back then. However, that all seemed to change overnight with the development of products such as BB creams, CC creams, highlighters, bronzers, primers and so forth.

Primers in particular are of interest because of the premise that they can improve coverage and extend your makeup’s longevity. To be clear, there are primers for just about everything: foundation primers, eyelid, eyelash, and even lip primers. However, of those mentioned, I personally cannot live without foundation or eyelid primers. Without these little gems, my makeup would shift, smudge and wear out before you could scream “hot mess.” While I don’t like adding time or more money into my beauty routine than need be, I promise that primers are well worth it.

My Favorite Primers: Face

  1. Rimmel Stay Matte Primer ($6.99) – This particular primer is great for those with normal to oily skin.
  1. Laura Mercier Foundation Primer ($36) – This primer certainly hits the high price point range. However, if budget isn’t an issue, you will have an array of primers to choose from based on your specific need. Of the list below, my loyalty lies with the radiance primer because I love the embedded pearl tint which adds a healthy glow to any foundation.
  1. Benefit the POREfessional Face Primer ($31)

My Favorite Primers: Eyelids

  1. Urban Decay Eyeshadow Primer Potion ($20 $10)

This is my everyday go-to eyelid primer. A little bit of product really goes a long way and I appreciate the fact that they have other shades that can be worn as primer, highlighters or even shadow.

  1. NARS Smudge Proof Eyeshadow Base ($26)

My Favorite Primers: Eyelashes

  1. Tarte Opening Act Lash Primer ($22)
  2. Dior Diorshow Maximizer Lash Plumping Serum ($28.50)

There are only two situations where I utilize eyelash primers. The first, is to lengthen and create full dramatic lashes. I find that using one is a viable alternative to wearing false eyelashes. The second situation is when I’m using a waterproof mascara. The additional barrier helps protect my natural lashes from the weight of waterproof mascara and helps expedite the mascara removal process.