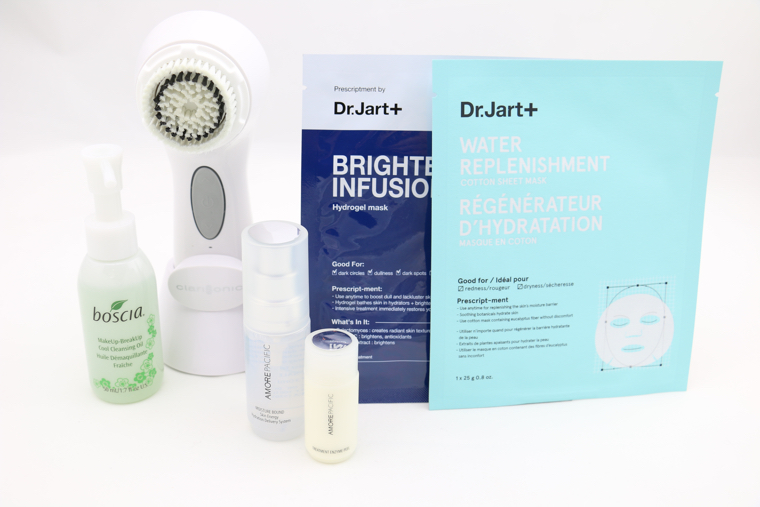
I debated long and hard before I decided to finally take the plunge and purchase my very first Clarisonic. I came to this decision after experiencing constant frustration with my skin’s complexion. No matter what products I used, my skin remained flakey and dull. So with my renewed vow to a better and healthier glow, I chose the Clarisonic Mia 3 K-Beauty Cleanse Set ($199). While pricey, I gravitated towards this Clarisonic set because it offered me the ability to try out three Korean beauty brands that I had heard of but never tried. The Clarisonic Mia 3 K-Beauty Cleanse Set includes brands such as Boscia, Dr. Jart+, and AmorePacific. I figured that using these products in conjunction with the Clarisonic Mia 3—a three-speed cleansing device—would give me the best results (the Clarisonic Mia 1 is one-speed while the Clarisonic Mia 2 supports 2 speeds). Well, my gamble paid off and I am beyond pleased with my new radiant face.
Within several weeks of use, my dry, patchy skin was becoming a thing of the past. In conjunction with the Clarisonic Mia 3, I used the accompanying Boscia Makeup-Breakup Cool Cleansing Oil ($30 for full version) which worked amazingly well to remove all makeup residue and other impurities. This new regimen left my face refreshed and luminous. Another added bonus was that it left me with a better canvas in which to apply my foundation. I instantly noticed my makeup application go on more smoothly and evenly. Overall, I can’t say enough great things about the Clarisonic Mia 3 K-Beauty Cleanse Set.
My Clarisonic Regimen:
- Remove all makeup.
- Dampen the Clarisonic brush head with warm water and place 1 to 2 pumps of the Boscia Makeup-Breakup Cool Cleansing Oil directly onto the brush head. (Note: this Clarisonic set comes with a sensitive head brush. Other brush types can be purchased according to your personal needs. Clarisonic recommends replacing the brush head every three months).
- Begin by pressing the Clarisonic’s middle button, then gently holding and moving the brush along sections of your face. This device does timed sections, so simply move to another part of your face with every beep. I like to use the fastest speed for my nose and chin (bye bye blackheads!!). I then lower the setting for the rest of my face.
- Rinse off your face with warm water and apply your favorite night cream. I use the CeraVe Facial Moisturizing Lotion PM ($13.99) because its non-comdogenic.
- For best results, use a maximum of three times per week. I found that using it more than that can cause breakouts. On my off days, I follow through with either a Dr. Jart+ mask or Dr. Gross Skincare Alpha Beta Universal Daily Peel.
Care and Cleaning:
Aside from changing the brush head as recommended, there are other steps that I take to ensure that my $200 investment lasts a long time.
- After every use, I rinse and clean the brush head against my palm in smooth circular motions. This removes any excess makeup residue and prevents discoloration.
- I then place the brush head on a clean flat towel to dry off.
- Next, I clean the inside of the Clarisonic with a Q-tip. Grime and other gunk can accumulate if you don’t follow this step. When finished, place it on the Clarisonic drying stand and let dry.
- I would not recommend using or storing the device in the shower. Keeping it dry helps keep it from becoming a breeding ground for grime.